

Microsoft
How to set up social connection with Microsoft Azure Active Directory
Overview
Adding social connection with Microsoft Azure to your app with Clerk only requires populating the Client ID, Client Secret and Authorized redirect URI in your instance settings.
To make the development flow as smooth as possible, Clerk uses preconfigured shared OAuth credentials and redirect URIs for development instances - no other configuration is needed.
For production instances, you will need to generate your own Client ID and Client Secret using your Microsoft Azure account.
Before you start
- You need to create a Clerk Application in your Clerk Dashboard. For more information, check out our Set up your application guide.
- You need to have a Microsoft Azure account, you can sign up for one here.
Limitations
- Currently Clerk supports only the
commontenant type, which is intended for allowing sign-ins both from organization members and public Microsoft users. - Only credentials of type
secretare currently supported (not thecertificatetype).
Selecting the desired tenant type (common, organizations, consumers or specific tenant ID) will become available in an upcoming version of Clerk.
Configuring Microsoft Social connection
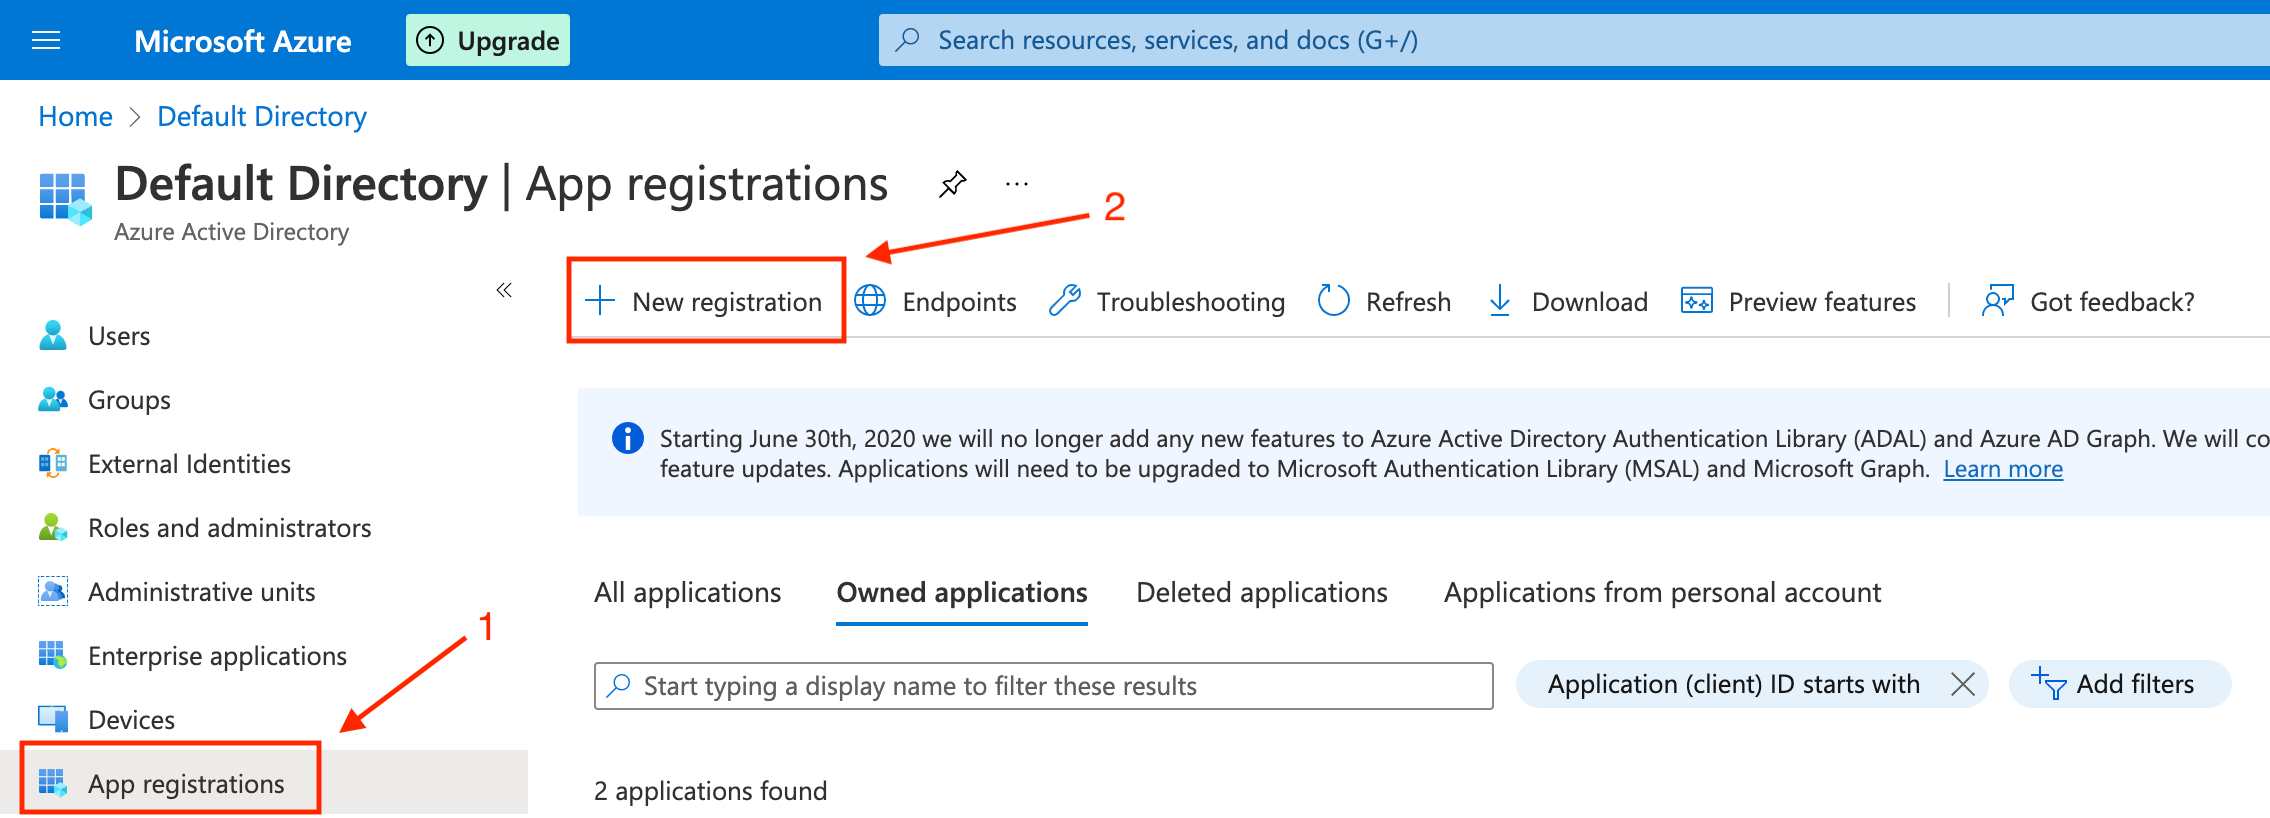
After creating a Microsoft Azure account, you will need to create a new App Registration.
To do so, navigate to the list of applications and click on New Registration.
In the new application form, make sure you fill in the following fields:


After creating a new app, you will be presented with the app information page.
The Application (client) ID visible on this page should be pasted into the Client ID form field on the Clerk end.
To generate a value you should click on the Client credentials link:


Microsoft Azure supports 2 kinds of credentials:
- Client secrets (as the majority of oauth providers)
- Certificates
At the time of writing Clerk supports only Client secrets.
To create a new client secret click on the New client secret button as illustrated below:

You will be prompted to provide a name & lifetime for the new secret.


After confirming your choice the new secret will be listed and this is the only time you will able to copy & paste it, thus make sure you do so before navigating away.
Also take note of the lifetime of said secret because you will need to generate a new one before it expires.
The newly generated secret can now be pasted in the Client Secret input on the Clerk end.
Finally, you'll need to instruct your Microsoft Azure app to operate in OpenID mode, so that it provides clerk with an id_token when the sign-in completes. This allows Clerk to populate data about the user from their Microsoft profile.
This can be done by navigating to the Authentication section and checking the option displayed below:

That's it! You are now ready to allow your users to sign in using Microsoft Azure!
Stay tuned for updates as Clerk integrates support for more Microsoft social connection options.