

Multi-factor
Learn how to require a second step during authentication.
Overview
Clerk supports multifactor authentication (MFA), often referred to as two-factor authentication or 2FA. By enabling MFA, you can encourage or require your users to perform a second verification check during sign-in.
The term multi-factor comes from the 3 main types of verifications:
- Knowledge-based - something you know, i.e. a password
- Possession-based - something you have, i.e. a phone or yubikey
- Inherent based - something you are, i.e. a fingerprint or a facial scan
By enforcing two different types of verifications, you can drastically improve your user's security. Most websites make this step optional, empowering their users with their own security.
Interested in single-factor authentication? Check out our guides on password-based and passwordless authentication.
Before you start
- You need to create a Clerk Application in your Clerk Dashboard. For more information, check out our Set up your application guide.
- You need to install Clerk React or ClerkJS to your application.
Configuration
There are two parts to enabling multi-factor authentication for your application. First, you need to apply the appropriate configuration setting in the Clerk Dashboard. Then, registered users need to turn on MFA for their own account through their User Profile page.
Dashboard configuration
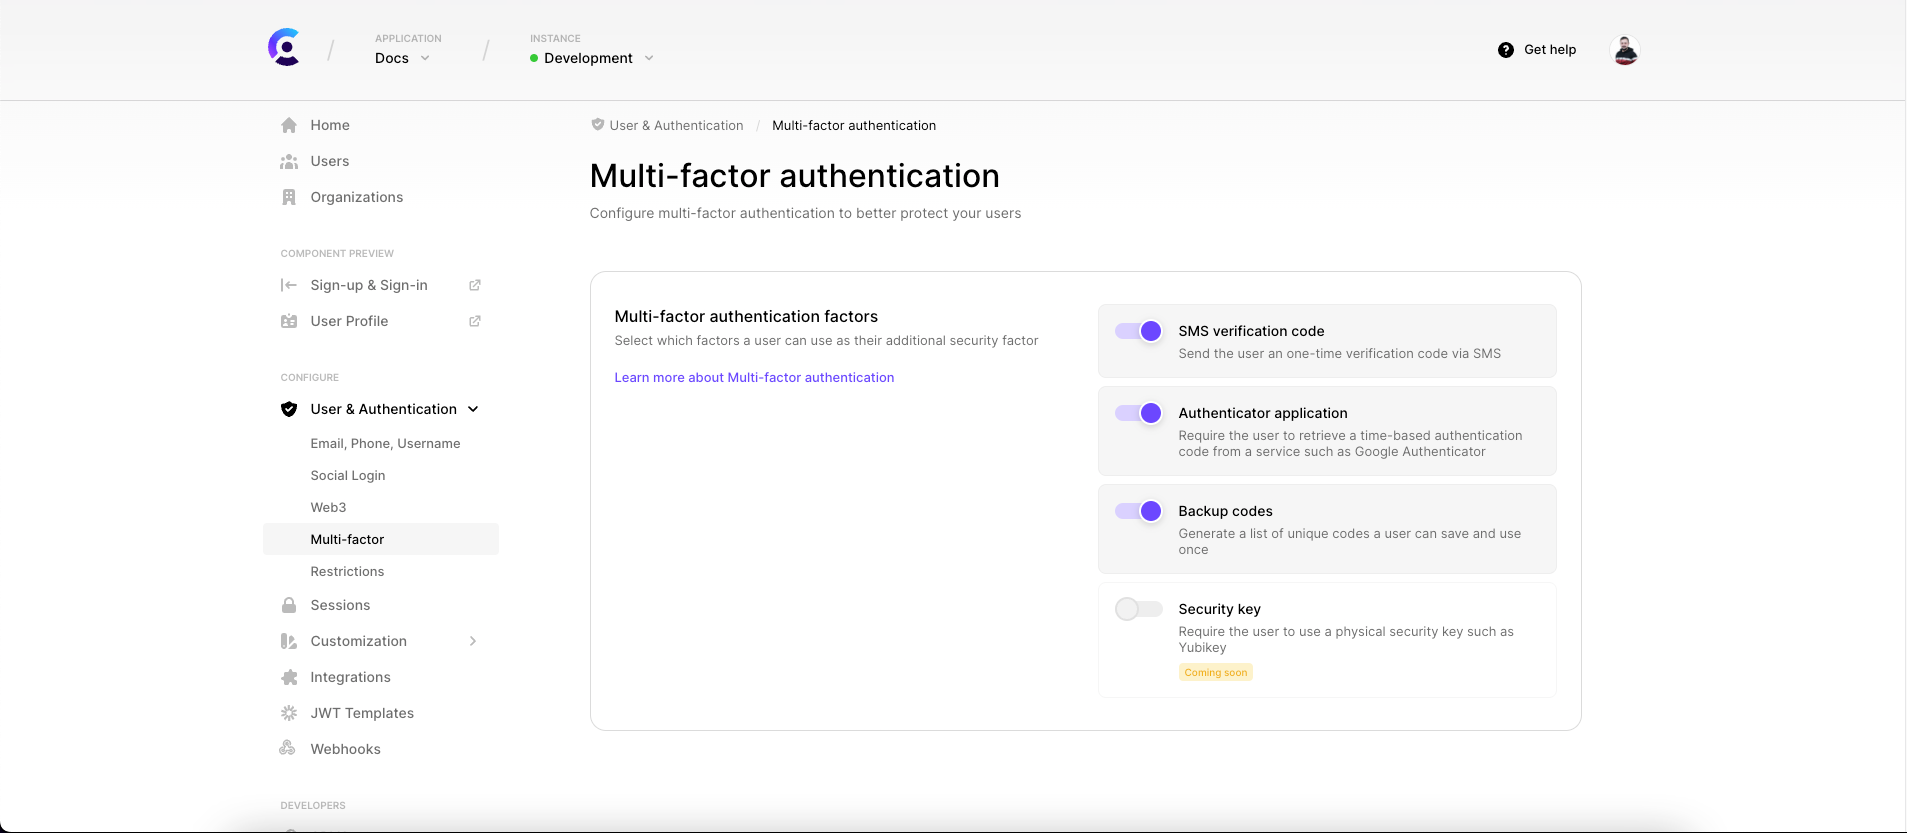
From your dashboard, select your application and instance, and then go to Authentication > Multi-factor.
We currently two types of second factors:
- SMS verification code
- Authenticator application (also known as TOTP - Time-based One-Time Password).
- Backup codes
More second factor variants will be added in the future.
If you're interested in a specific Multi-factor method that we don't support yet, let us know!
Don't forget to click on the Apply Changes button at the bottom of the page once you're done.
User profile configuration
After enabling the second factor of your preference, registered users will still need to enable MFA from their user profile page. Currently, MFA can not be required on all user accounts, this is coming soon.
Users will need to navigate to their user profile, and go to Security > Sign in > 2-step verification. From there they can choose which second factor to enable, out of the factors that the admin has enabled in the dashboard.
The easiest way to add multi-factor authentication to your application is to use Clerk Components.
Authenticator App (TOTP)
To be able to use this method with Clerk Hosted Account pages, you will need to opt in to version 4 (v4) of our components. This is enabled by default for new applications, but for existing apps you will need to navigate to Settings > General and enable New Clerk Components, as per the following screenshot:


Once this is on, users can visit User Profile > Security > 2-step Verification and enable Authenticator application.
The user will be presented with a QR code that they can scan with their preferred authenticator application such as Google Authenticator, 1Password, etc or if they prefer to do a manual setup they can copy the TOTP secret or URI to paste it in their app.

After performing the setup on their authenticator app, Clerk will prompt them for a code generated from the app so as to ensure that the configuration is correct and that they are indeed in possession of an app with which they can authenticate to Clerk.
By providing a valid TOTP code, Authenticator App as a second factor will kick in after they authenticate with their first factor.

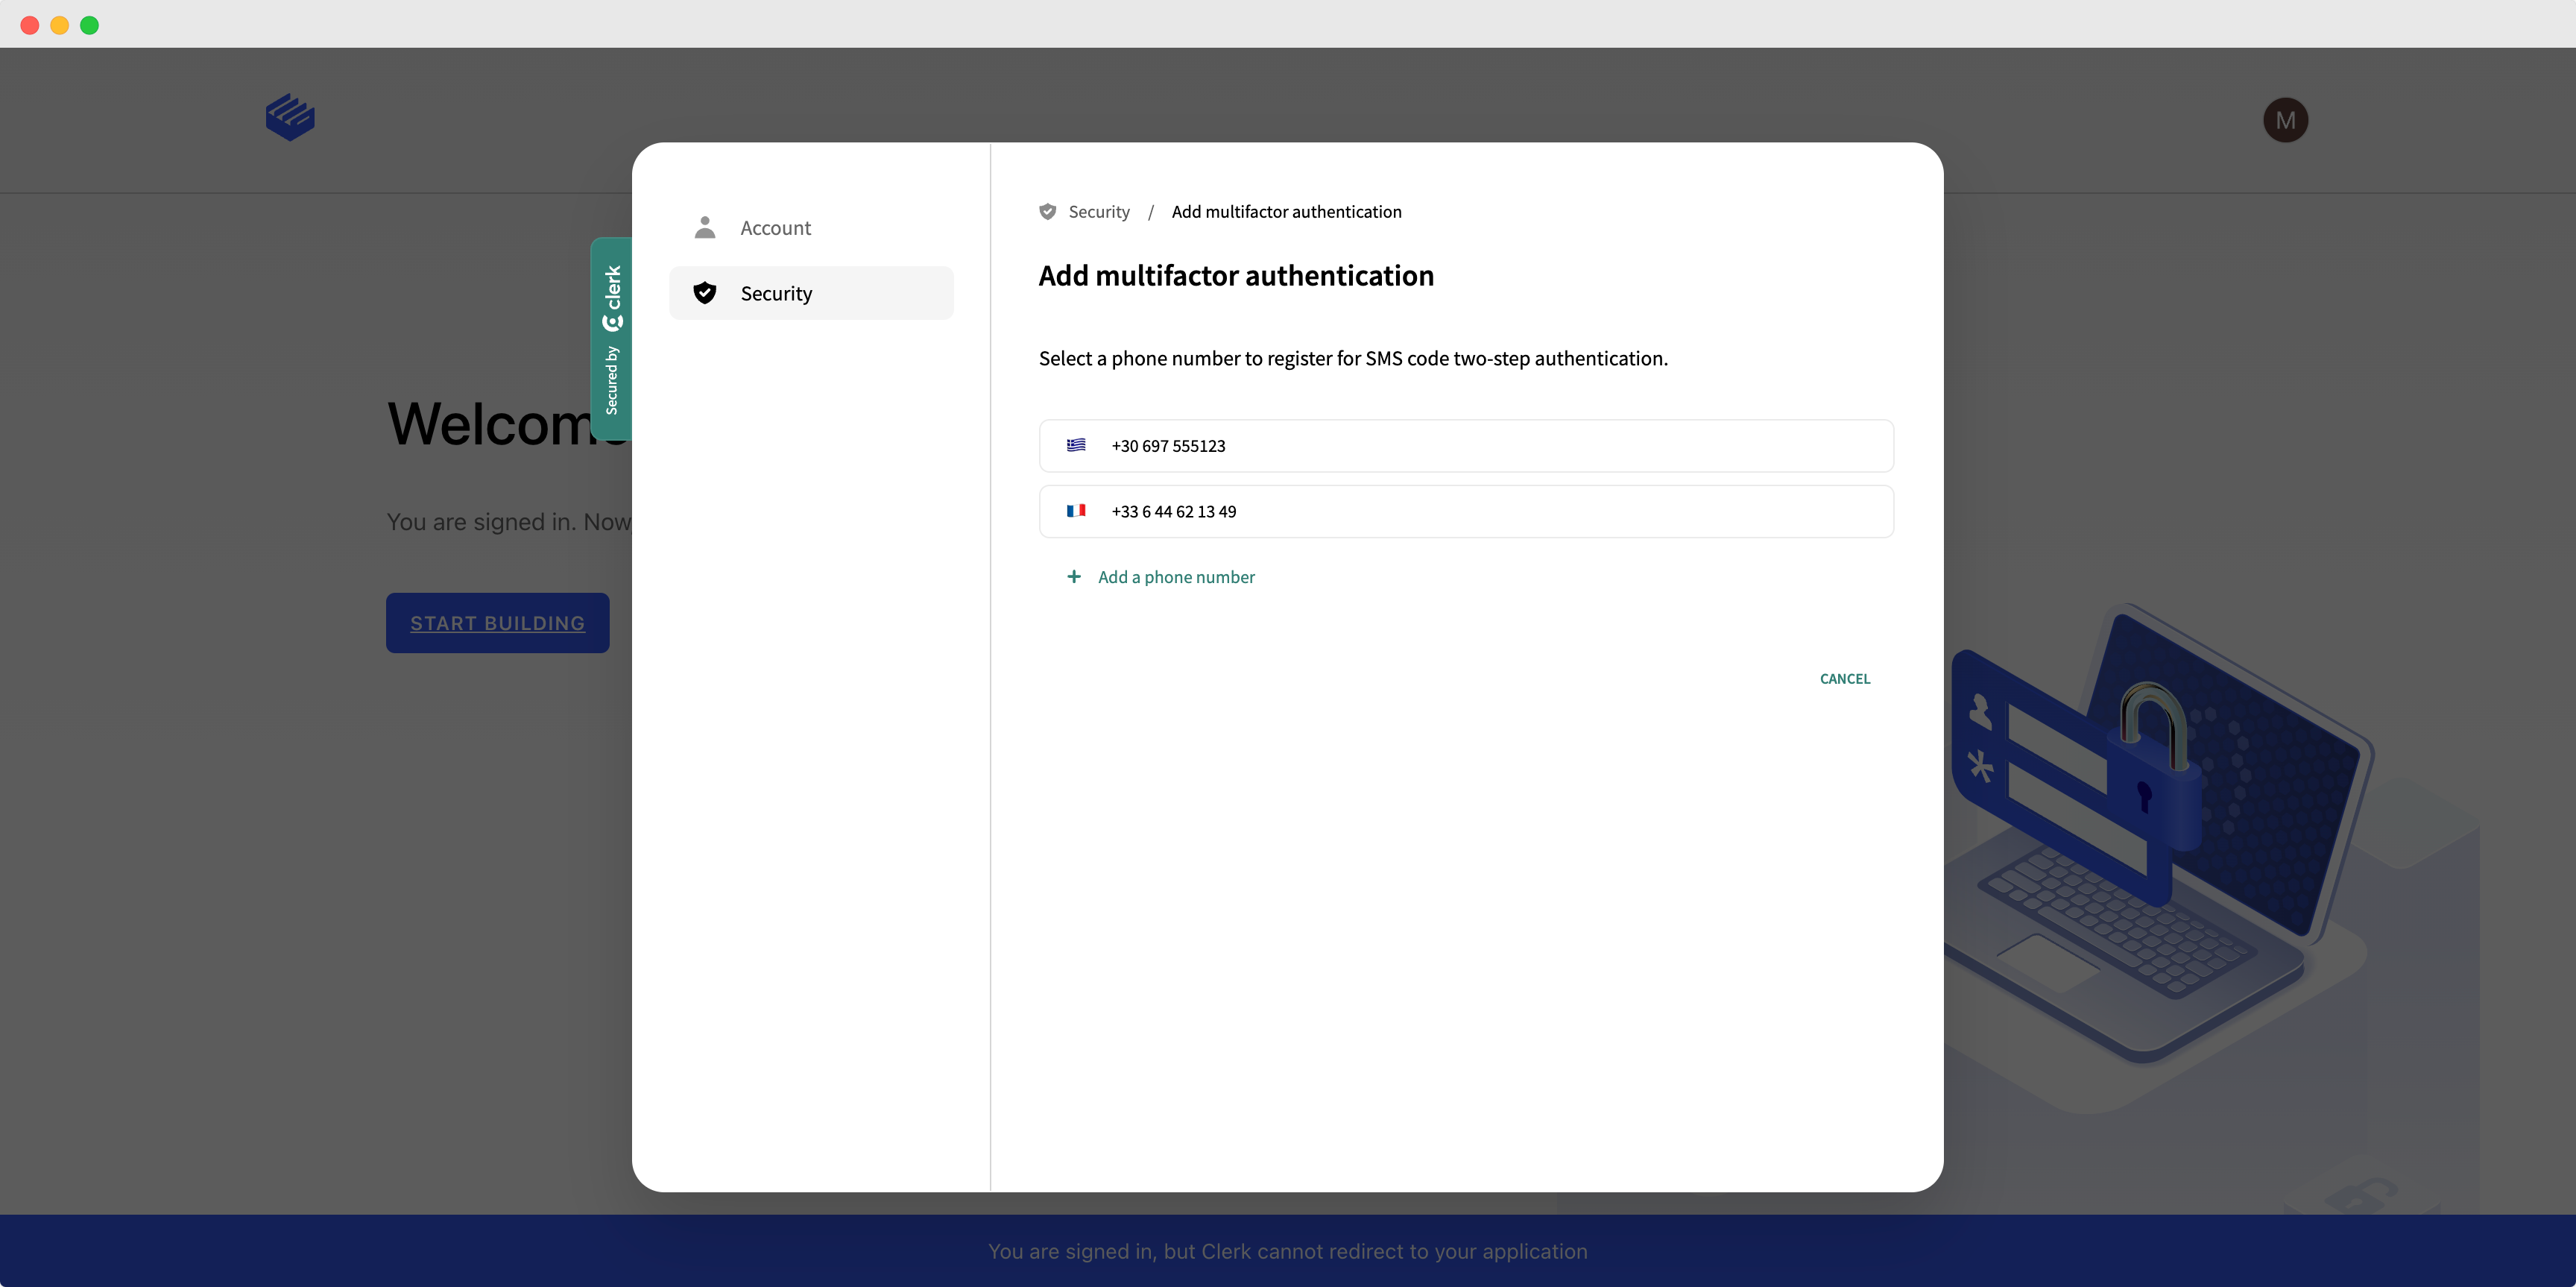
SMS verification code
If this method is available, the user can:
- enable it on one of their existing phone numbers, or
- add a new phone number on the fly and then select if for use as a second factor
Backup codes
Backup codes, also known as recovery codes, are a set of unique codes that can only be used once to regain access on your account by bypassing Multifactor authentication in case you lose access to your Authentication device.
As Clerk promotes the best security practices, when a user enables Multifactor for the first time, then also a set of backup codes are generated and provided by default. Of course users can regenerate a new set of backup codes anytime they want.


There are 3 different available ways to strore them. Copy on clipboard, download a txt file with all the nessecary information and also a print option as well.
When users trying to sign in and during the second factor prompt, they can instead use an active backup code to bypass the other Multifactor methods that may be enabled.


Custom flow
If you want more flexibility, you can make use of lower-level commands and create a completely custom multi-factor authentication flow.
You still need to configure your instance in order to enable multi-factor authentication, as described in the Dashboard configuration section of this guide. Your users will also need to explicitly enable MFA for their account, as described in the User profile configuration section of this guide.
Signing in to an MFA enabled account is identical to the regular sign-in process, however, a sign-in won't convert until both verifications are completed.
The first three steps are part of the standard sign-in flow. Steps 4 and 5 power are the additional authentication factor.
- Initiate the sign-in process, by collecting the user's authentication identifier.
- Prepare the first factor verification.
- Attempt to complete the first factor verification.
- Prepare the second factor verification. (This is where MFA comes into play)
- Attempt to complete the second factor verification.
Let's see the above in action.
1import { useSignIn } from "@clerk/clerk-react";23function SignInPage() {4const { signIn } = useSignIn();56async function onClick(e) {7e.preventDefault();8// Sign the user in with email address and9// password.10await signIn.create({11identifier: "user@example.com",12password: "********",13});1415// Prepare the second factor verification by16// specifying the phone code strategy. An SMS17// message with a one-time code will be sent18// to the user's verified phone number.19await signIn.prepareSecondFactor({20strategy: "phone_code",21});2223// Attempt to complete the second factor24// verification, passing the previously25// received one-time code.26await signIn.attemptSecondFactor({27strategy: "phone_code",28code: "123456",29});30}3132return (33<button onClick={onClick}>34Sign in with MFA35</button>36);37}
1const { client } = window.Clerk;23// Sign the user in with the required first4// factor strategy. In this case it's email5// and password.6const signIn = await client.signIn.create({7identifier: "user@example.com",8password: "**********",9});1011// Prepare the second factor verification by12// specifying the phone code strategy. An SMS13// message with a one-time code will be sent14// to the user's verified phone number.15await signIn.prepareSecondFactor({16strategy: "phone_code",17});1819// Attempt to complete the second factor20// verification, passing the previously21// received one-time code.22await signIn.attemptSecondFactor({23strategy: "phone_code",24code: "123456",25});